本文记录了 Ubuntu 22.04 LTS 系统上,手动搭建 LNMP 环境的详细操作过程。
前言
CentOS 7 系统将会于 2024-06-30 停止维护更新,是时候考虑更换服务器的操作系统了。
在 Debian 和 Ubuntu 两者之间考虑了一下,还是选择了 Ubuntu 系统。
Ubuntu 系统不需要特意更换 apt 源也能达到可观的下载速度,本地构建时会方便不少。
本文 Linux 系统 : WSL2 , Ubuntu 22.04 LTS
文中使用的命令均为 root 用户执行。
开始搭建
此部分正式开始在 Ubuntu 22.04 LTS 上搭建 LNMP 环境,建议先执行以下命令(可选):
-
在 Ubuntu 上切换为
root用户su root -
更新 Ubuntu 的软件包列表
apt update
安装 Nginx
- 执行以下命令开始安装 Nginx
apt install nginx - 编辑 Ubuntu 上的 Nginx 默认配置文件
/etc/nginx/sites-available/defaultvi /etc/nginx/sites-available/default - 清空
/etc/nginx/sites-available/default文件原有的内容,并将以下代码块的内容复制粘贴至其中,保存后退出server { listen 80; root /usr/share/nginx/html; server_name localhost; location / { index index.php index.html index.htm; } location ~ .php$ { fastcgi_pass 127.0.0.1:9000; fastcgi_index index.php; fastcgi_param SCRIPT_FILENAME $document_root$fastcgi_script_name; include fastcgi_params; } } - 执行以下命令重新载入 Nginx
systemctl reload nginx - 执行以下命令将 Nginx 加入开机自启
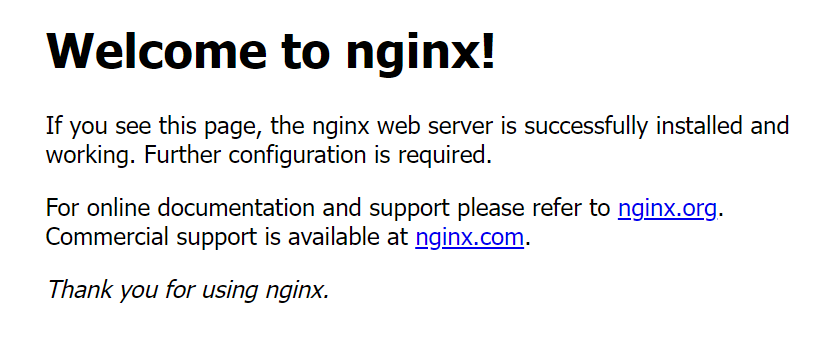
systemctl enable nginx - 最后验证 Nginx 是否正常运行,浏览器访问 Linux 服务器的 IP 地址,若出现 Welcome to nginx! 字样则表明 Nginx 已正常运行

如果 IP 地址不能正常访问,那么需要检查服务器是否放行了 80 端口。
安装 MariaDB
- 执行以下命令开始安装 MariaDB
apt install mariadb-server mariadb-client - 执行以下命令将 MariaDB 加入开机自启
systemctl enable mariadb - 最后验证 MariaDB 是否正常运行,执行命令
mysql进入 MariaDB ,若显示 Welcome to the MariaDB monitor. 字样则表明 MariaDB 已正常运行mysql- 以下为命令执行结果,输入命令
\q可退出 MariaDBWelcome to the MariaDB monitor. Commands end with ; or \g. Your MariaDB connection id is 32 Server version: 10.6.16-MariaDB-0ubuntu0.22.04.1 Ubuntu 22.04 Copyright (c) 2000, 2018, Oracle, MariaDB Corporation Ab and others. Type 'help;' or '\h' for help. Type '\c' to clear the current input statement.
- 以下为命令执行结果,输入命令
安装 PHP
- 执行以下命令开始安装 PHP
apt install php-fpm php-cli php-mysqlnd php-common php-gd php-xml - 执行以下命令查看 PHP 版本
php -v- 以下为命令执行的结果:
PHP 8.1.2-1ubuntu2.14 (cli) (built: Aug 18 2023 11:41:11) (NTS)
Copyright (c) The PHP Group
Zend Engine v4.1.2, Copyright (c) Zend Technologies
    with Zend OPcache v8.1.2-1ubuntu2.14, Copyright (c), by Zend Technologies
- 以下为命令执行的结果:
- 可以看到已安装的 PHP 为 8.1 版本,则编辑 8.1 版本 PHP 对应的
www.conf文件vi /etc/php/8.1/fpm/pool.d/www.conf - 将
www.conf文件中的listen = /run/php/php8.1-fpm.sock修改为listen = 127.0.0.1:9000,保存后退出- 以下为修改后的结果,部分内容省略:
......
; The address on which to accept FastCGI requests.
; Valid syntaxes are:
;   'ip.add.re.ss:port'    - to listen on a TCP socket to a specific IPv4 address on
;                            a specific port;
;   '[ip:6:addr:ess]:port' - to listen on a TCP socket to a specific IPv6 address on
;                            a specific port;
;   'port'                 - to listen on a TCP socket to all addresses
;                            (IPv6 and IPv4-mapped) on a specific port;
;   '/path/to/unix/socket' - to listen on a unix socket.
; Note: This value is mandatory.
listen = 127.0.0.1:9000
......
- 以下为修改后的结果,部分内容省略:
- 重新启动 8.1 版本的 PHP-FPM 服务
systemctl restart php8.1-fpm - 执行以下命令将 PHP-FPM 加入开机自启
systemctl enable php8.1-fpm
总结
在 Ubuntu 22.04 LTS 和 CentOS 7 上搭建的 LNMP 环境有稍许不同:
- Ubuntu 22.04 LTS :
- Ubuntu 22.04 LTS 上的 Nginx 默认配置文件目录路径为
/etc/nginx/sites-available/ - Ubuntu 22.04 LTS 上的 PHP-FPM 默认使用 UNIX Domain Socket 通信方式
- Ubuntu 22.04 LTS 上的 Nginx 默认配置文件目录路径为
- CentOS 7 :
- CentOS 7 上的 Nginx 默认配置文件目录路径为
/etc/nginx/conf.d/ - CentOS 7 上的 PHP-FPM 默认使用 TCP 通信方式
- CentOS 7 上的 Nginx 默认配置文件目录路径为